How can I uninstall QA Disk Repair completely from my computer? This question is not only asked by you. Many computer users are also searching for the solutions to remove QA Disk Repair from their computer systems. It's very easy to install a program, as what you need to do is to double click on its installer and follow its installer. But it becomes more complicated when you want to uninstall it completely from your computer, for you may run into various problems during the uninstallation process, such as strange error messages, failure to find it in Programs and Features. If you're searching for effective solutions to remove QA Disk Repair, please check the uninstall methods below.
Possible Error Caused by Incorrect Uninstall Methods
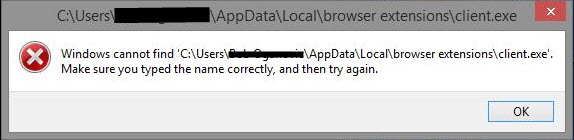
Error example
The above error messages are all caused by incomplete uninstallation of related programs. Incompletely uninstallation of a program will leave some invalid keys in the system registry, which will cause such error pop-ups when the system still executes them.
Automatically Uninstall QA Disk Repair (Recommended):
This specialized uninstaller can not only help you uninstall QA Disk Repair from the computer effectively, but also identify and delete all leftover files, folders and invalid registry entries belonging to QA Disk Repair.
Manually Uninstall QA Disk Repair:
Step 1: End all processes that are related to QA Disk Repair
Step 2: Uninstall QA Disk Repair
Step 3: Delete invalid entries of QA Disk Repair in the registry
Step 4: Delete leftovers of QA Disk Repair in hard drive
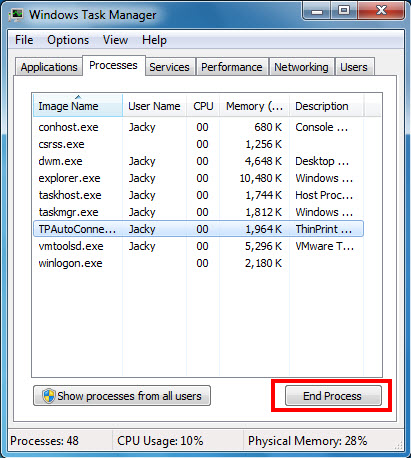
Step 1: End all processes that are related to QA Disk Repair
Hold Ctrl, Shift and Esc keys on the keyboard to open Task Manager. Then click on the related process and click End Process (in Windows 7, Vista) or End Task (in Windows 8) button.
Step 2: Uninstall QA Disk Repair
You can uninstall QA Disk Repair by any of the following uninstall methods:
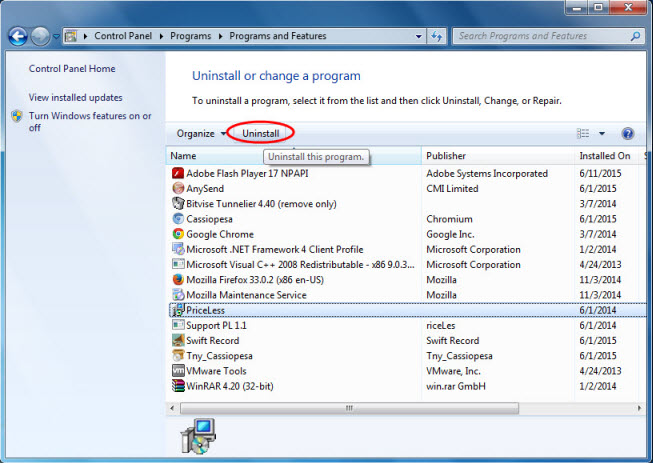
Method 1: Uninstall QA Disk Repair in Programs and Features
1. Open Programs and Features.
In Windows 7 and Vista,
Click Start menu, type in programs and feature and click on it to open.

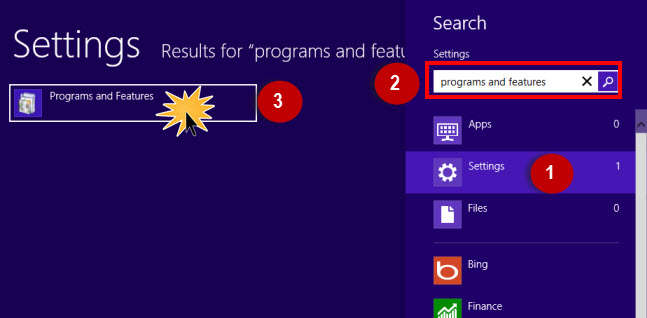
In Windows 8 or later,
a. When in the "Start" screen, click Settings and type in programs and features
b. Click on Programs and Features from the Settings search results
2. Click on QA Disk Repair and click Uninstall to uninstall it from your computer.
Method 2: Reinstall to Uninstall QA Disk Repair
If some of program files that are needed to uninstall QA Disk Repair are missing or corrupted, you may fail to uninstall it. Believe it or not, reinstalling QA Disk Repair may do the trick. If you still keep the original disk or the download file of QA Disk Repair, you can try that to repair the program. After repairing the program, you can try to uninstall it again.
Method 3: Uninstall QA Disk Repair via Virus Removal Tool
Some unwanted programs can install into your computer without being noticed, as they like to spread by attaching to free software and games that people often download online. Sometimes, you cannot remember when certain program was installed on your computer until you suffer a lot from its annoying pop-ups. Usually, this kind of potentially unwanted programs can escape from the detection of your installed antivirus. If you have tried the above methods but still fail to remove QA Disk Repair, it's really necessary for you to check whether it's a virus or not. Click and download this powerful Virus Removal Tool to check your PC. If it's a computer virus, it will be automatically deleted when you click Remove after the scan.
Step 3: Delete invalid entries of QA Disk Repair in the registry
Video Guide: How to back up and edit the registry
Note: It's very important for you to know that the registry is one of the most important part of the Windows system, you should be extremely careful when deleting any keys in the registry. Any small mistake can result in severe problems or even system crash. So removing QA Disk Repair by editing the registry is only recommended to computer users with certain computer knowledge. If you don't want to take the risk to damage your computer system, it's recomended that you use this Automatic Registry Cleaner to clean invalid keys.
Step 4: End all processes that are related to QA Disk Repair
Even you uninstall QA Disk Repair in Control Panel and remove invalid keys in the registry, there are still some folders left in hard drive. To completely remove QA Disk Repair from your system, you can go to the following locations to delete the folders of QA Disk Repair.
C:\Program Files (x86)
C:\Program Files
C:\ProgramData
C:\Users\Default\AppData\Local
C:\Users\Default\AppData\Roaming
Uninstall QA Disk Repair via Automatic Uninstaller
Not every program can be easily uninstalled by the above manual uninstall methods, as not everyone of us are good at computers and manually editing computer settings. We may fail to uninstall a program successfully due to various reasons, such as missing necessary files, strange error messages, and no permission to uninstall the program. At this time, a professional third-party uninstaller will be very handy to help us easily and completely get rid of any unwanted program off our computer system. With only a few clicks, this powerful third-party uninstaller can automatically scan and identify all files and components related to QA Disk Repair and then completely remove QA Disk Repair. Click and download this professional Automatic Uninstaller below to uninstall your program now.